

How to Install and Configure Elasticsearch on Windows
Elasticsearch is a robust, open-source search and analytics engine ideal for log analytics, full-text search, and large-scale data processing. This comprehensive guide walks you through installing, configuring, and running a single-node Elasticsearch instance on Windows, including setting it up as a Windows service, resetting passwords, and optimizing configurations for performance and security. This tutorial is designed for both beginners and experienced developers.
Prerequisites
Before starting, ensure you have:
- A Windows machine (Windows 10 or later recommended).
- Administrative access for installing services and modifying system files.
- A web browser to validate the Elasticsearch instance.
- Basic knowledge of Command Prompt or PowerShell.
- (Optional) Java Development Kit (JDK) if using a version of Elasticsearch that doesn’t bundle OpenJDK (versions 8.x and later typically include it).
Step 1: Download and Install Elasticsearch
-
Download Elasticsearch
Visit the official Elasticsearch downloads page and download the latest Windows ZIP file (e.g., elasticsearch-9.x.x-windows-x86_64.zip).
-
Unzip the File
Extract the ZIP file to the root of your C: drive (e.g., C:\elasticsearch-9.x.x) for simplicity. You can use tools like WinRAR, 7-Zip, or Windows’ built-in extraction feature.
Example Path: C:\elasticsearch-9.x.x
Step 2: Run Elasticsearch
-
Navigate to the Elasticsearch Directory
Open a Command Prompt or PowerShell with administrative privileges and navigate to the bin directory:
cd C:\elasticsearch-9.x.x\bin -
Run Elasticsearch
Start Elasticsearch by running:
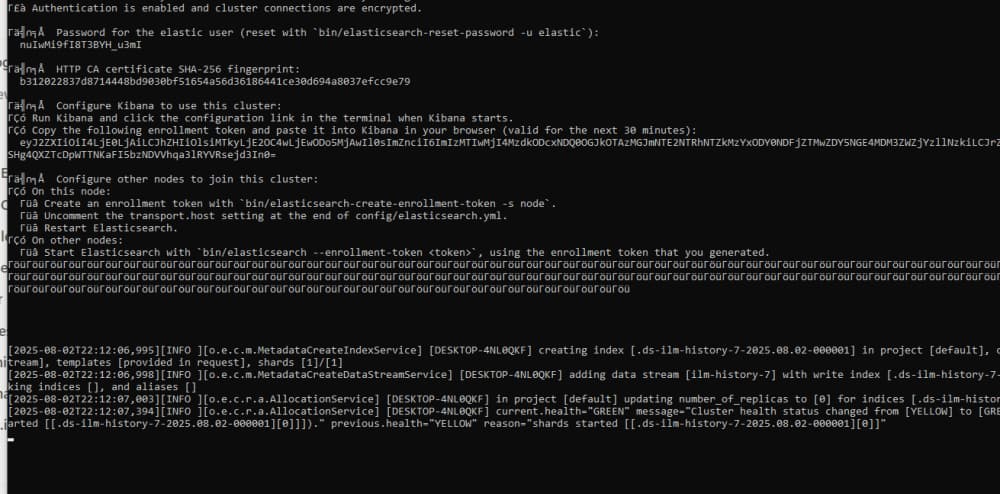
elasticsearch.batThe terminal will display startup logs. Look for a message indicating that Elasticsearch has started, along with the default password for the elastic user, such as:
[INFO] Elasticsearch started The generated password for the elastic built-in superuser is: nuIwMi9fI8T3BYH_u3mISave this password for authentication.
Note: Closing the terminal will stop Elasticsearch. To avoid this, consider running it as a Windows service (covered in Step 4).
Step 3: Reset the Elastic User Password
To secure your Elasticsearch instance, reset the default elastic user password:
-
Ensure the Elasticsearch server is running.
-
Open a new Command Prompt or PowerShell and navigate to the bin directory:
cd C:\elasticsearch-9.x.x\bin -
Run the password reset command:
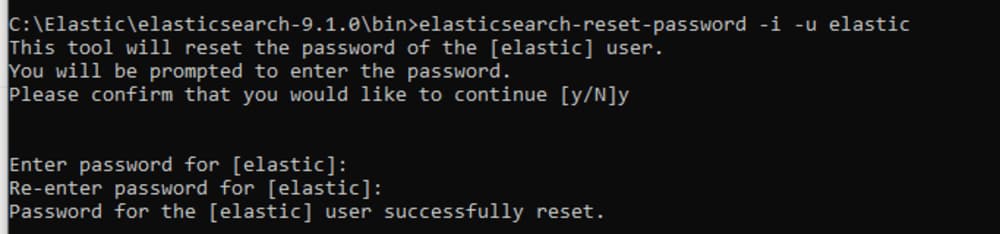
elasticsearch-reset-password -i -u elastic -
When prompted, press y to confirm, then enter and re-enter your new password:
This tool will reset the password of the [elastic] user to an autogenerated value. Proceed? [y/N] y Enter new password: ******** Re-enter new password: ******** Password for the [elastic] user successfully reset. New password: new_password_here -
Save the new password for future use.
Step 4: Install Elasticsearch as a Windows Service
Running Elasticsearch as a Windows service ensures it starts automatically with your system and operates in the background without a persistent terminal.
Pros of Running as a Service
- ✅ Automatic Startup: Launches with Windows boot.
- ✅ Background Operation: No need for an open Command Prompt.
- ✅ Centralized Management: Control via Windows Services Manager (services.msc) or PowerShell.
- ✅ Production-Ready: Ideal for continuous operation.
- ✅ Integrated Logging: Logs are stored in the Windows Event Log for easy monitoring.
Cons of Running as a Service
- ❌ Setup Complexity: Requires configuring Java paths and permissions.
- ❌ Permission Issues: The default LocalSystem account may face access issues if directories aren’t configured properly.
- ❌ Debugging Challenges: Errors appear in the Windows Event Log, not the console.
- ❌ Service Management: Updates require stopping and restarting the service.
- ❌ Memory Configuration: JVM heap settings must be pre-configured.
Steps to Install
-
Navigate to the bin directory:
cd C:\elasticsearch-9.x.x\bin -
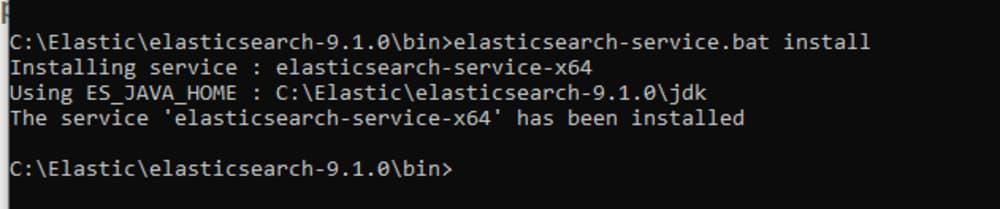
Install the service:
elasticsearch-service.bat installA confirmation message will indicate successful installation.
-
Manage the Service:
-
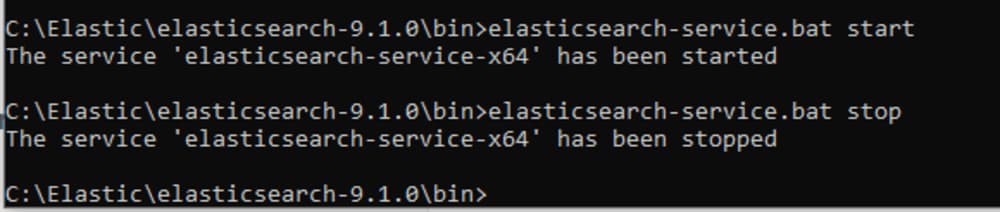
Start the Service:
elasticsearch-service.bat start -
Stop the Service:
elasticsearch-service.bat stop -
Open Service Manager GUI: This opens a GUI to start, stop, or configure the service.
elasticsearch-service.bat manager -
Remove the Service (if needed):
elasticsearch-service.bat remove
-
-
Verify Installation:
- Press Win + R, type services.msc, and press Enter.
- Locate the Elasticsearch service and check its status (e.g., Running or Stopped).
Step 5: Configure Elasticsearch
Customize Elasticsearch settings by editing the elasticsearch.yml file in the config directory (e.g., C:\elasticsearch-9.x.x\config\elasticsearch.yml).
1. Change Data Storage Path
By default, Elasticsearch stores data in the data folder within its installation directory. To customize:
path.data: ["C:\\elasticsearch-9.x.x\\data", "D:\\elastic_data"]
- Specify one or multiple paths for data storage.
- Ensure the directories exist and are writable.
- Remove any # before path.data to enable the setting.
2. Set Memory Limits
Elasticsearch’s default memory allocation (1 GB) may be insufficient for large datasets or multiple queries. To adjust:
-
Navigate to the bin directory:
cd C:\elasticsearch-9.x.x\bin -
Open the service manager:
elasticsearch-service.bat manager -
In the GUI, go to the Java tab and set the Initial Memory Pool and Maximum Memory Pool to higher values (e.g., 10240 MB for 10 GB).
3. Disable HTTPS (Optional)
Elasticsearch uses HTTPS by default. To switch to HTTP for local testing:
xpack.security.http.ssl: enabled: false
Access Elasticsearch via http://localhost:9200/ after disabling SSL.
4. Restrict Remote Access (Optional)
Control who can access your Elasticsearch instance:
http.host: 127.0.0.1
- 127.0.0.1: Restricts access to localhost.
- 0.0.0.0: Allows access from any IP (use cautiously in production).
- Specify a LAN IP (e.g., 192.168.1.100) to limit access to a specific network.
5. Change the Default Port (Optional)
Elasticsearch uses port 9200 by default. To change it:
http.port: 9200
Replace 9200 with your desired port.
6. Apply Changes
After editing elasticsearch.yml, save the file and restart the service:
elasticsearch-service.bat stop elasticsearch-service.bat start
Step 6: Validate Elasticsearch
To confirm Elasticsearch is running:
-
Open a web browser and navigate to https://localhost:9200/ (or http://localhost:9200/ if HTTPS is disabled).
-
Enter the credentials:
- Username: elastic
- Password: The password from Step 2 or the reset password from Step 3.
-
A JSON response should appear, confirming the server is running:
{ "name": "your-node-name", "cluster_name": "elasticsearch", "version": { "number": "9.x.x", ... }, ... }
If you see certificate warnings, this is normal for local HTTPS setups. Accept the warning or disable HTTPS as described above.
Conclusion
You’ve successfully installed, configured, and validated a single-node Elasticsearch instance on Windows! By running it as a service, resetting the elastic user password, and optimizing settings like data paths and memory limits, you’ve set up a robust environment for search and analytics. For advanced configurations, refer to the official Elasticsearch documentation.
For a visual guide, check out this video tutorial (replace with the actual link if available).
About the Author
Hi, I’m Arfatur Rahman, a Full-Stack Developer from Chittagong, Bangladesh, specializing in AI-powered applications, RAG-based chatbots, and scalable web platforms. I’ve worked with tools like Next.js, LangChain, OpenAI, Azure, and Supabase, building everything from real-time dashboards to SaaS products with payment integration. Passionate about web development, vector databases, and AI integration, I enjoy sharing what I learn through writing and open-source work.
Connect with me:
👨💻 GitHub
✍️ Dev.to
📚 Medium


About the Author

Comments
No Comments
Leave a replay
Your email address will not be publish. Required fields are marked *