
Step-by-Step Guide to Setting Up and Using Azure AI Services with LangChain
Azure AI Services is a robust platform that allows developers to explore, deploy, and leverage AI models for various use cases, including natural language processing and embeddings. This guide walks you through the complete process of creating an Azure AI resource, deploying models, and integrating them into your application using LangChain.
Introduction
In the world of AI and machine learning, deploying powerful tools quickly and efficiently is key to innovation. Azure AI Services empowers developers with access to pre-trained and customizable AI models that can easily be deployed for chat, embeddings, or other applications. This blog post will guide you through the process of:
- Creating a new Azure AI Service
- Deploying a model for natural language processing tasks
- Using the LangChain library to integrate embeddings and chat functionality
We'll provide detailed steps, code examples, and the necessary configurations to get started. Let's dive in!
Step 1: Create an Azure AI Service Resource
-
Navigate to portal.azure.com.
-
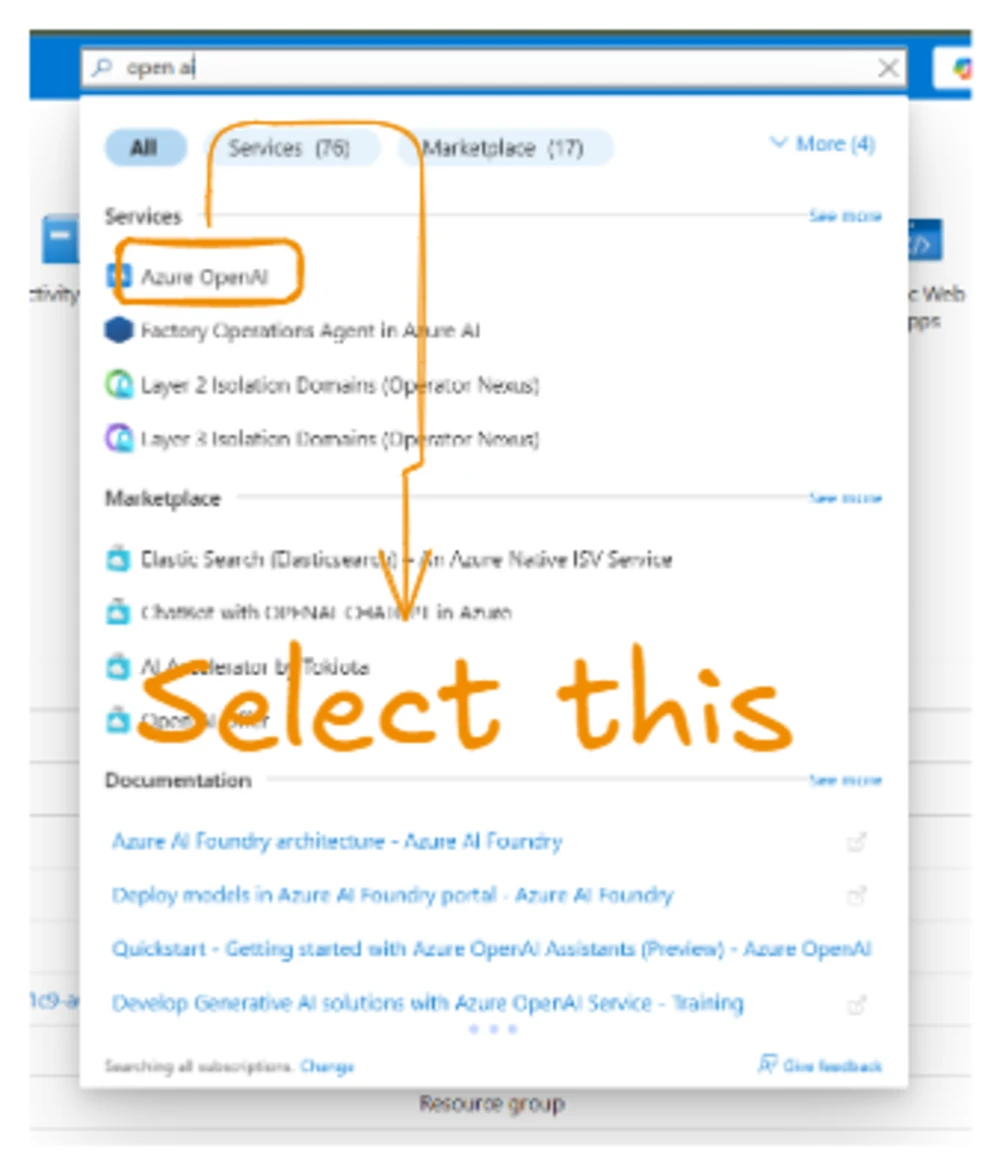
Search for Azure OpenAI in the search bar.
-
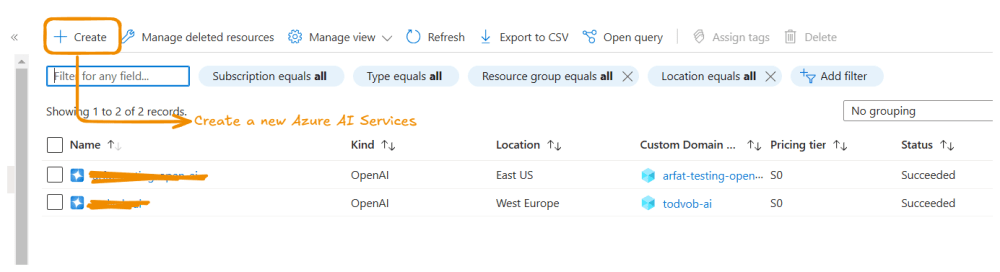
Click on Create Azure AI Service.
-
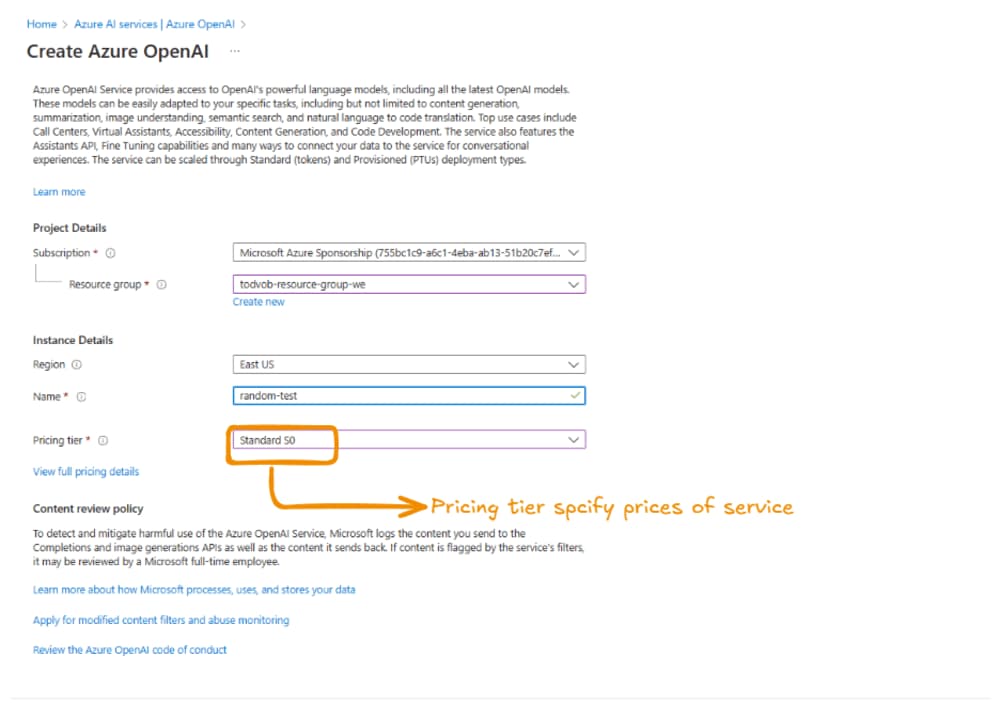
Fill in the required basic details. Ensure the Network option is set to allow public access for seamless integration.
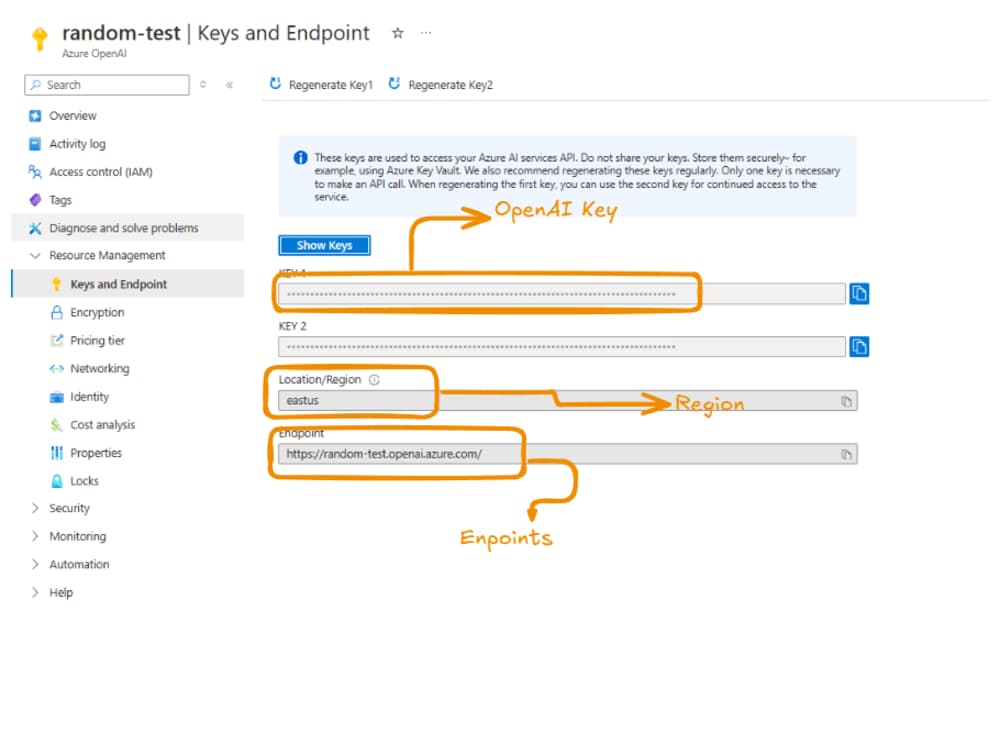
Step 2: Retrieve Keys and Endpoints
Once the service is created:
- Navigate to the Keys and Endpoint section of the resource.
- Collect the required credentials:
- Endpoint URL
- Keys (Key 1 or Key 2)
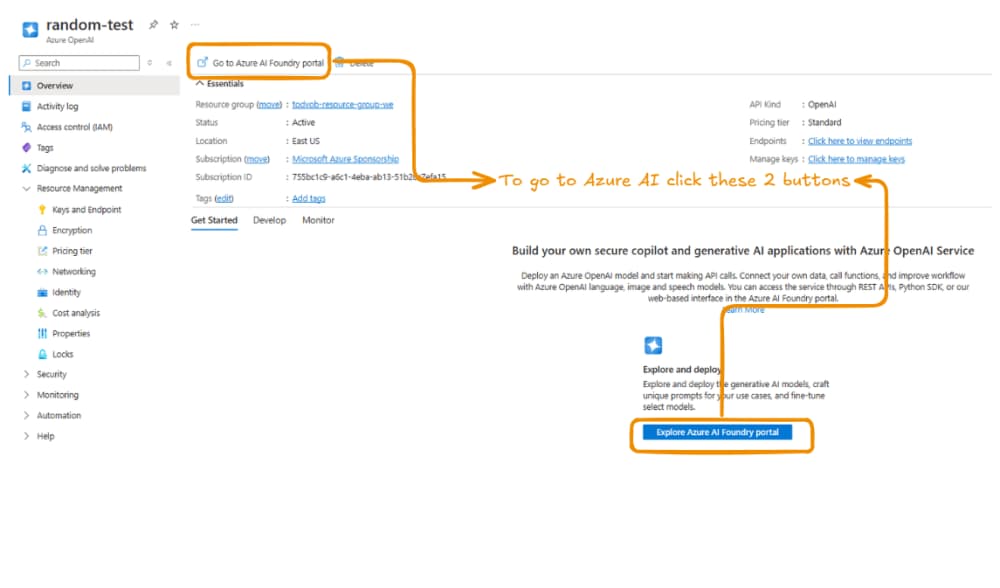
Step 3: Access the Azure AI Foundry Portal
To explore and manage your deployed models:
-
Go to the Overview section of the service.
-
Click Go to Azure AI Foundry portal.
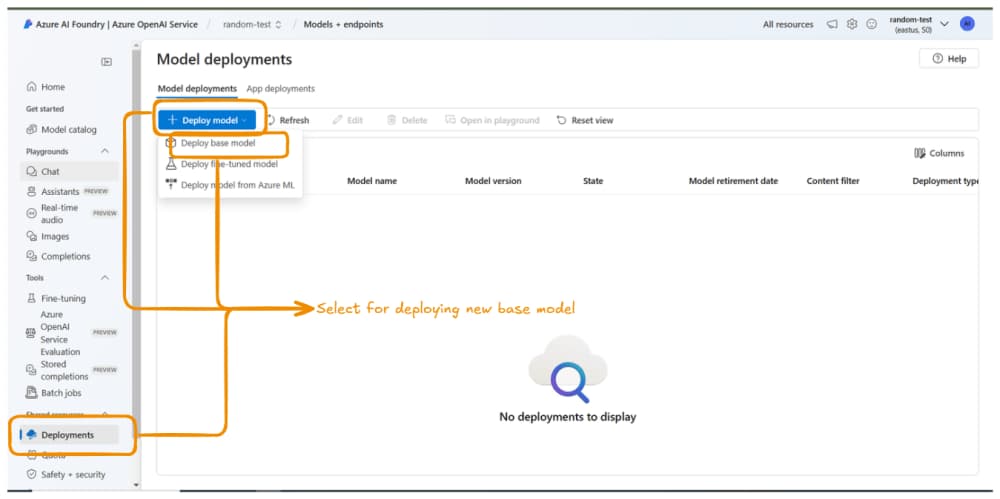
Step 4: Deploy a Base Model
To deploy a new model:
-
Navigate to the Developments tab in the Azure AI Foundry portal.
-
Select Deploy Model and choose Deploy Base Model.
Note: "Deploy Base Model" deploys an existing pre-trained model. "Deploy Fine-tuned Model" allows you to customize a model with your data. In this tutorial, we'll stick to base models.
-
Select a model, confirm your choice, and customize deployment settings as required. Finally, click Deploy.
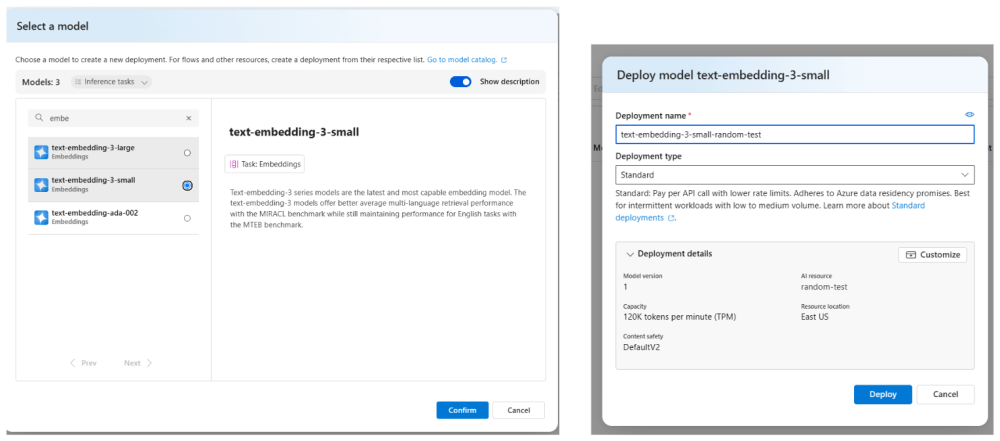
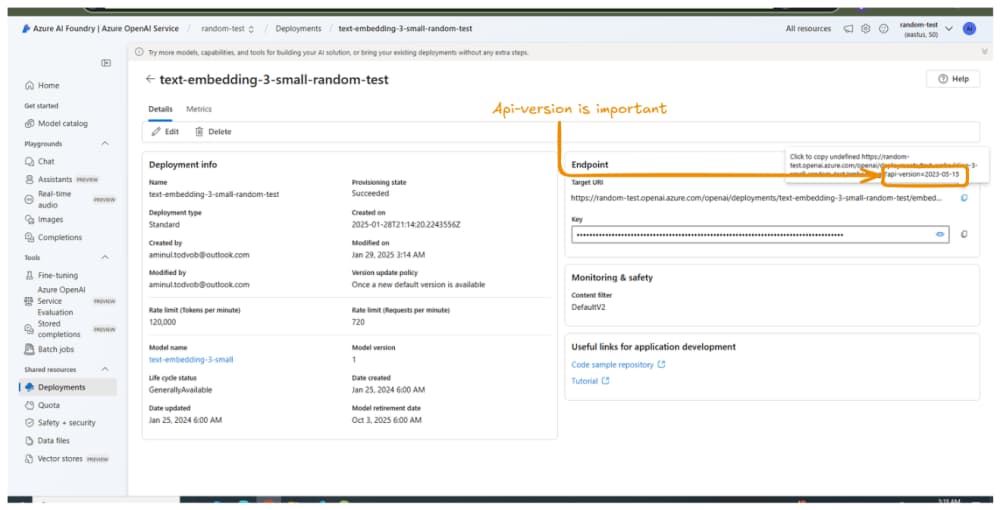
-
Once the deployment is complete, you'll see the model's overview, including its API Version, which will be crucial for integration.
Step 5: Integrate Embeddings into Your Application
To use embeddings, you can integrate them into your application with the LangChain library. Here’s how:
import { OpenAIEmbeddings } from "@langchain/openai"; const azureEmbeddings = new OpenAIEmbeddings({ azureOpenAIApiKey: "", // Azure OpenAI Key from the Keys section azureOpenAIApiInstanceName: "random-test", // Subdomain name from the Endpoint azureOpenAIApiEmbeddingsDeploymentName: "text-embedding-3-small-random-test", // Deployment name azureOpenAIApiVersion: "2023-05-15", // API Version from the model overview });
Important: Avoid using AzureOpenAIEmbeddings from @langchain/openai as it is deprecated.
Step 6: Configure Chat Completions
For chat functionality, create a new model and integrate it with LangChain. Use the following example code:
import { AzureOpenAI } from "openai"; // Create Azure OpenAI Instance const azureOpenAI = new AzureOpenAI({ endpoint: "https://random-test.openai.azure.com/", // Endpoint from Keys section apiVersion: "2024-08-01-preview", // API Version from the model overview apiKey: "", // Azure OpenAI Key from the Keys section }); // Generate Chat Completions const choices = await azureOpenAI.chat.completions.create({ model: "gpt-4o", messages: chatMessages, // Array of messages for the conversation temperature: 0.8, // Adjust creativity level });
Conclusion
Setting up Azure AI Services and integrating them into your applications can be straightforward if you follow the right steps. By deploying base models and integrating embeddings or chat completions with LangChain, you can leverage the power of AI to enhance your projects efficiently. Whether for natural language understanding, chat interfaces, or other applications, Azure AI provides the scalability and customization you need.
Now that you've gone through the process, you're ready to explore advanced features like fine-tuning models or building end-to-end pipelines. Happy building!


About the Author

Comments
No Comments
Leave a replay
Your email address will not be publish. Required fields are marked *